ALL ABOUT THE BASE

REVIEW: MAYBELLINE FIT ME RANGE

I believe in the power of base makeup. I wasn’t born with a perfect porcelain skin, so I depend (a lot) on my base. Foundation, concealer, and powder are totally my best friend. When Maybelline Fit Me Range was launched, I was super excited because they carry two kind of foundation, Dewy + Smooth for Normal to Dry Skin and Matte + Poreless for Oily Skin. And of course, having an oily skin, I love the Matte + Poreless one.

Cons: they didn’t come with pump, so be careful when pouring it.

So, what’s the difference between both foundation?

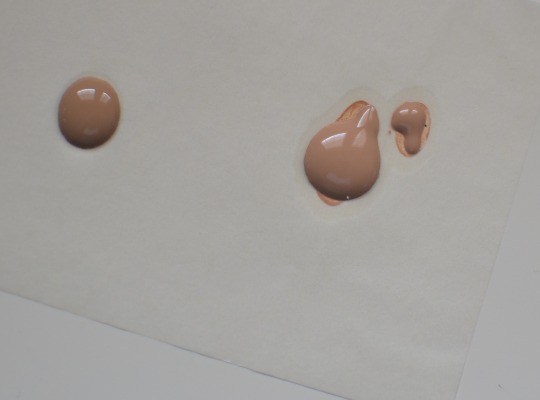
I tested on blotting paper as I always does with other foundation of mine, and check that out. The right one is the Dewy + Smooth, look at oil that surrounds the foundation. Meanwhile, the Matte + Poreless on the left side, doesn’t have that much oil surround it.

Let’s move on to concealer, shall we?

I love the wand, seriously! it picked up the right amount of concealer to cover one zit. The texture is just right, not too watery nor too thick and blended well when applied with finger or beauty blender. Choose the lighter shade for highlight and the correct shade for your skin tone to conceal everything, from blemishes, spots and dark circles.

Last but not least, FIT ME POWDER.

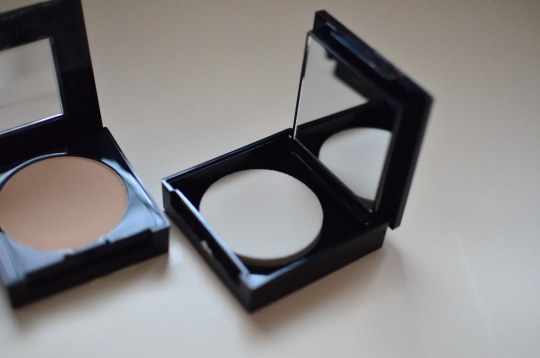
Like the foundation, they come with two choices, for SET + SMOOTH for normal to dry skin and MATTE + PORELESS for normal to oily skin. Comes with sponge and mirror, also perfect for touch ups.

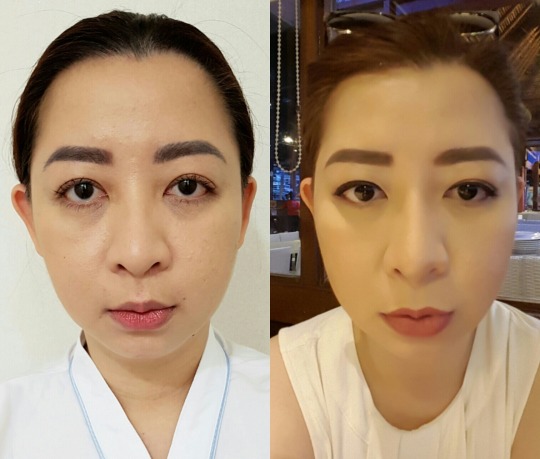
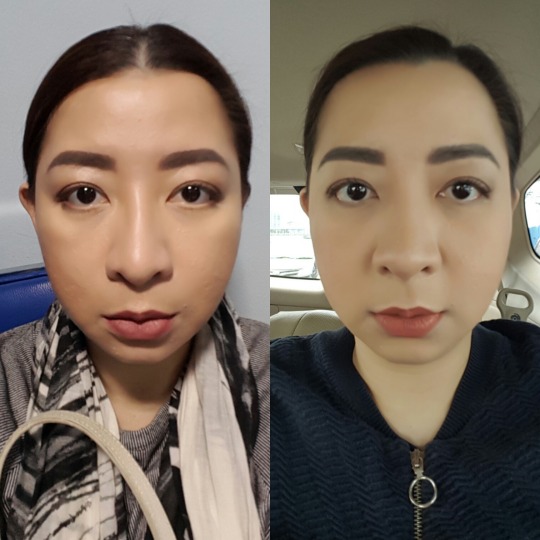
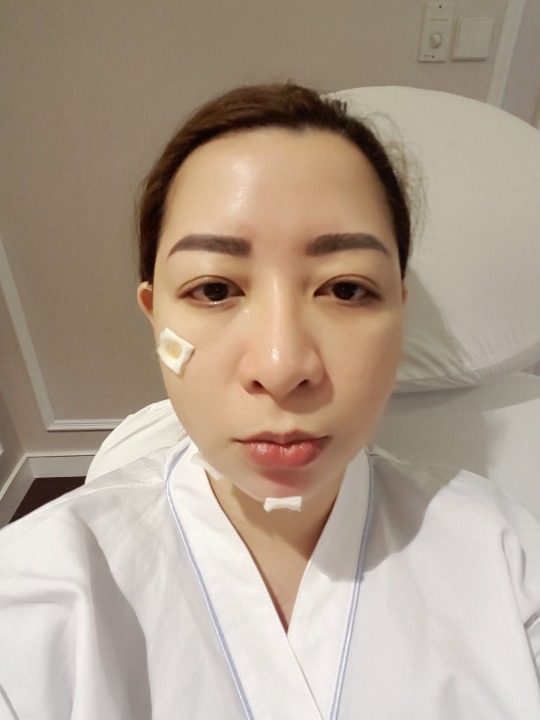
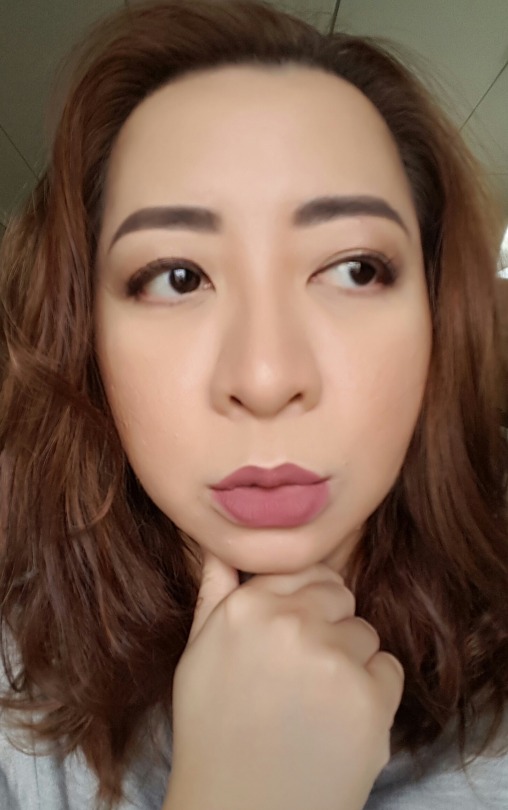
My tips to look super natural: use Matte + Poreless foundation and end with SET + SMOOTH powder. It won’t give you that dead matte look (see my pic below).

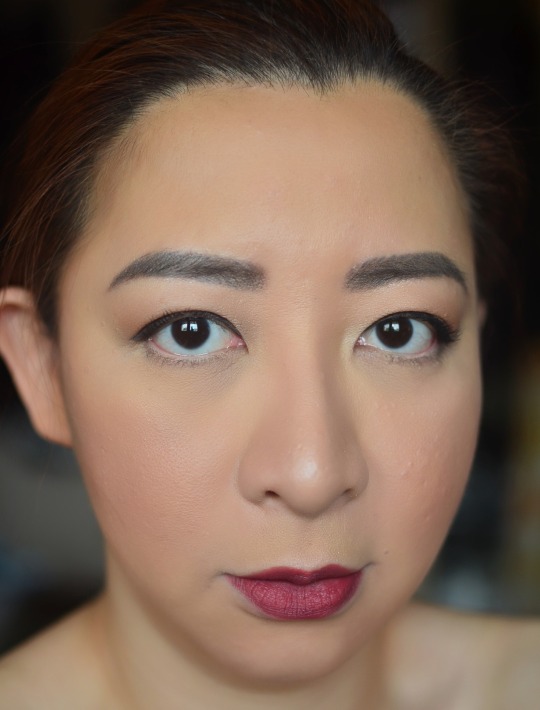
For the coverage, I might say that it doesn’t fall on heavy category. Concealer is still a must. However, to cover big pores and stay true matte for hours, it did a very good job. Totally recommended.

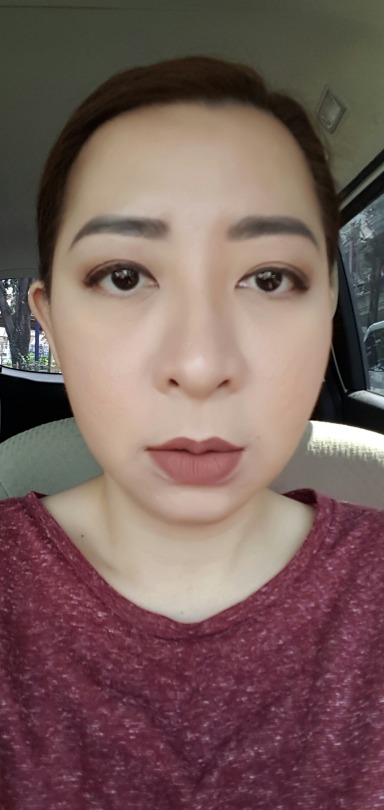
And of course, I also try the DEWY + SMOOTH foundation, end with Matte + Poreless Powder to make it less shiny.

What do you think of the comparison? I believe the Dewy + Smooth Foundation gives more healthy look, even though I am not a big fan of the texture. More liquidy than the Matte + Poreless Foundation and it feels stickier. But I love the final result after I set with Matte + Poreless Powder. I believe the powder help to minimize my big pores as well as toning down the stickiness of the Dewy + Smooth Foundation. As for the coverage, this also needs concealer to help cover things up.

Final Verdict: these Fit Me range is definitely my new favorite. I’ll mix things up depends on my skin condition which can be super oily at one moment and dry the other. I will repurchase them because I use base makeup every day, it sounds silly to splurge on high end ones.

PURE PERFECTION

This wonderful product by DIPTYQUE surely arrived at never better timing. 

I was watching tutorial by Wayne Goss (I’m a huge fan, by the way!) and it was a tutorial video on how we can make our foundation works better. Wayne suggested a drop of oil (whatever as long as it’s not lavender) and my beauty fairy seems to hear my wish. Came along DIPTYQUE INFUSED FACE OIL.

I mean, who doesn’t love their luxurious candles with their wonderful scents? The thrill when we open the box and smell the scent coming out was pretty magical, and so it did when I unboxed this on instagram. 

//platform.instagram.com/en_US/embeds.js

The scent didn’t come up like when we opened the candle box. But take a deep look on that bottle!!! To see rose petals floating around inside the bottle was pretty magical for me. It’s so gorgeous!! Very Diptyque, I might say. 

And when I opened the luxurious dropper bottle, the fragrance blew my mind. It’s not rose per se, more to powdery iris & almond scent. And being a dry oil, it feels light on skin and absorb really well. A part of L’Art du Soin for the Face, DIPTYQUE INFUSED FACE OIL claimed to boosts radiance, revitalizes & smoothes. 

Inspired by Wayne Goss’ tutorial on youtube, I decided to mix this with my regular foundation. Let’s see how it goes!

As you can see, it looked way better when I mixed my foundation with this oil. It feels better on my skin and blended very well too. My skin looks healthy and radiant, I’m very pleased beyond words with the result. I believe my lines look softened and my foundation didn’t set on my lines. 

There are many recommended ways to use this oil. We can apply this by its’ own as morning & night time skin routine, use it for face massage or mix it with your regular face cream to boost more radiance. 

PHOTOS: SHINTA ROSVITA

MY FAVORITE MAKEUP BRUSHES

Call me experimental..but I do love to collect brushes. So far I have 21 brushes in my collection.

Most of them I bought online after watching beauty vloggers raved about them. Some were the result of impulse buying, that ended up as ‘misses’ brushes. Let me put it in a more simple way: I don’t like them all. 

So, which one are my faves?

From top to bottom:

MAC168: this is a large angled contour brush, which of course I use it to contour. It picked up powder nicely without fall out and even though the bristles is white, it cleansed easily with the right brush soap.

MAC217: I had this for ages until the logo faded away. I believe if cheaper brands made a dupe out of a brush, the original must be super awesome. And yup, this is my go to brush for blending eyeshadow on the outer area.

MAC 09: even though this is a small contour brush, I use it to apply setting powder on my under eyes area. Good brush shall multi task!

Coastal Scents Pro Blending Fluff: I bought this because it’s a dupe for MAC217 which apparently I already had. Why? Because I want to test the comparison. Not bad in performance, even though the bristles is more coarse than MAC, but hey..it’s so cheap so don’t complain. 

MORPHE M510: it’s a round blender for eyeshadow application. Some might find it’s too big for the eyelids alone, but I have wide eyelids, so it fits just fine. Sometimes, I use this for applying highlighter on upper cheeks too.

ZOEVA102: a vegan taklon foundation brush. Not a vegan myself, but I love this brush. I use this to blend liquid foundation as it won’t leave any weird strokes on my face.

ZOEVA106: I bought this as a set with other Zoeva brushes on this list (Classic Set Brush), and this one also has vegan bristles. Super soft and big enough to dust loose powder all over my face. 

MAC266: my go to eyeliner brush, as I love gel eyeliner. This made application super easy, as I also love to do cat eyeliner.

MAC208: I believe it is 208, as it’s so old…the logo already faded away. But the performance of the brush is still like the first time I used it. This is an eyebrow brush, I use it with brow powder.

OVAL FOUNDATION BRUSH: this is a dupe of Artis oval foundation brush which costs like 10 times more. And of course this has no brand, costs only IDR 50K. Pretty dense bristles, I was skeptical when I first washed them as I was afraid all the bristles might fall off after the first wash. Turned out after hundreds of washes, it’s still look the same. So yeah…never judge the performance by its’ price. 

MAC Isabel & Ruben Toledo 129SE: I love limited edition, but living in Jakarta made it harder to get one. My husband bought this for me in Malaysia. Even though this is a powder/blush brush, I use this every day as a blush brush. The fluffy round bristles made the blush looks so natural..like glow from within. 

ZOEVA142: Last but not least, concealer buffer brush. A handcrafted brush which I use to apply concealer around the eyes. I rarely use it to cover acne or brown spots, as I prefer to use my finger to pat concealer on spots. 

So yeah…that’s all folks. My suggestion if you want to collect makeup brushes:
* Acknowledge your need, not what you want (hello impulse buyer!!!)
* Find review of the brushes
* Deciding to save or to splurge (expensive ones do last longer)

Next on my brush bucket list is the fan brush…I’m thinking to get one right now…hmmmm

PHOTOS: SHINTA ROSVITA

TO CELEBRATE MY …. BIRTHDAY, I DID THIS!

My first BOTOX at Jakarta Aesthetic Clinic with the one and only dr. Olivia Ong, dipl. AAAM (Aesthetician and Anti-Aging Specialist).

And Botox was not the only procedure I had at dr. Olivia’s beautiful clinic. After consultation with her, apparently I need filler and rejuvenation. As I age (I’m not gonna tell you how old I am..lol), it’s not just the wrinkles I worried about, I looked tired as hell. See before after pics below.

Cheeks began to sag, dark circles got worse and turned out I did have bunny lines. And did you see how wide my nose was? And did you notice my chin got sucked in by age? A bit skeptical about the whole treatment, because I was worried about the post-effect. Turned out….that was me a week after the whole procedures. If you need more proof, check out the pics below…taken one day and two days after. Although dr. Olivia said that some swelling might occurred, I felt only a bit chubbier on the third day. 

For Botox, results may vary…some will see improvement within days up to 30 days. But I might say, I’m impressed with my results. Botox were shot on my forehead, both sides of nose, chin and bunny lines. 

Another before after pics after my second visit..my chin looked longer and my nose looked slimmer. And lots of improvement on my dark circles. 

If you asked me “was it painful?” I’d answer “beauty is pain, darling”. I wouldn’t lie to you, but botox shots are nothing compared to filler. But no worries, dr. Olivia and team will make you feel at ease. First, the application of anaesthetic cream aka numb cream on the specific areas that will be treated. 

Noticed the brown oil below? It named “amazing oil”. And..it lived up to the name. I believe it kept the redness at bay. 

Compressed with amazing oil after the treatment. I have to admit, the one that hurt the most was the chin area, filled with filler. Dr. Olivia used Restylane filler to fill my under eyes and chin. More than just shaping, filler also made my skin more plump and tight. 

Voila!!!! That was my latest pic after about 2 weeks. My skin looks better, overall result: I have fresher & slimmer face on my … birthday (still not gonna tell..lol).

Will these results last forever? Unfortunately, not. Botox & filler need different touch up sessions. For more information about Jakarta Aesthetic Clinic, please click here. 

PHOTOS: SHINTA ROSVITA 

NO MORE BAD NAIL DAY

Just like hair, I always feel good when my nails look pretty.

That’s why I’m excited when I got invited to the launch of REVLON COLORSTAY GEL ENVY LONGWEAR NAIL ENAMEL earlier this month.

At the event, I found out from their Brand Manager, that Revlon was actually launch nail polish first before everything else way back in 1932. They surely upped their nail game with these latest innovation!

DSC_9810 copy

Personally, I love gel nails for their shine, fast drying and long lasting factor. Revlon ColorStay Gel Envy Longwear Nail Enamel covered two out of three! They look like gel with the shine (thanks to the formula which contain optical brighteners) and they’re long lasting too (they’ll chipped after 7 days on me). Even without the ColorStay Gel Envy Diamond Top Coat, they already shine like gel nails.

Yup…there are two steps to achieve these nails. The color comes with base, so no need to apply base coat beforehand. After color, then top coat. Very time-saving indeed, no need for UV light. And best of all, these nail shades allow us to change as often as we want (they’re really cheap at IDR 70K a pop). As for removal, just use your regular nail remover without any hassle to go to the nail salon to remove your gel nails. Easy peasy!

I tried the shade “Queen of Hearts”, a pretty bluish bold red shade. Pretty, right? In total, they have 10 shades…and I’m already thinking to change to that cute turquoise shade named “Dealer’s Choice”.

Thanks Revlon Indonesia and Fimela.com for having me and fellow bloggers.

PHOTOS: SHINTA ROSVITA

WHY I LOVE KYLIE LIP KIT?

It took me awhile to buy this super famous lipstick from Kylie Jenner.

Why? Because online shipping from KylieCosmetics.com is surely not available to ship to Indonesia where I live. But then if they can do it, the tax will be absurd..more than the price of the kit itself. And….the online shops here are charging us cray cray. Some sold them for almost IDR700K per kit (while it cost only USD$29 online on KylieCosmetics). It almost doubled the original price when converted to our currency.

So I decided to wait until the whole hype is cooling down, with the hope that the price will decrease. And they did! So I bought CANDY K LIP KIT for IDR600K (including shipping-not bad) from my regular online shop here in Indonesia.

I picked this shade because I believe I haven’t had this colour in my collection. After the unboxing video happened, first thing first…the scent. The liquid lipstick does have a quite strong scent..like vanilla/butterscotch scent. But the scent won’t stay there forever after applied. The texture is quite liquidy but after applied, it turned matte shortly. The wand is long, so it does make applying session more easy and picked up the liquid in enough portion for one use. I believe one layer is enough, as if you piled it up it might get cracky.

Have to admit…I looovvveee the lip liner. It is very opaque in texture but not drying at all. I never attempt to fill the whole lips with the pencil though, but for lining…it is the champion so far! Minus factor: this ain’t no automatic ones, so have to sharpen manually.

Don’t you think this shade looks very photogenic? I love how it felt on my lips..it’s not super drying (you still need to moisturise before applying this), and somehow I believe my lips look plumper and bigger when I use this. Still far from Kylie’s though..LOL.

As for the longevity…it might slipped off if you eat oily foods (especially on inner lips), but it won’t transfer on a cup when you drink. Touch up is needed, but do make sure you wipe the whole thing off before, as it might get tacky if you applied on top of the previous one.

Final verdict: come to think of it, the quality comes with the price. Since they come in pair (lip liner and liquid lipstick), somehow it sounds affordable for this super hype brand. Anyway, high end lipsticks can go way beyond for just the lipstick itself. But my suggestion for all Indonesians who want to buy this online in Indonesia..don’t pay more than IDR600K.

PHOTOS: SHINTA ROSVITA

WHERE DO I GO FOR FACIAL?

I got questions about this a lot.

Frankly speaking I don’t like facial that involves acne or blackhead extraction. It hurts. The only thing that I love about facial is simply the massage. Don’t we all?

But then again, we all need facial. At least, once a month to clear out those clogged pores because a simple exfoliation with scrub at home just won’t do if you have problematic skin like me. Please don’t try to pinch that thing out of your skin, because it’ll cause pores trauma (yes, pores can have traumas) and make them look larger than life. 

I trust JAKARTA AESTHETIC CLINIC to do my facial. They called it “COMEDONES PEELING” (peeling komedo in my languange-bahasa). The clinic itself doesn’t look like an ordinary clinic, I always feel like going to a spa when I entered their door. Private rooms with spa music and very modern and comfortable chair, this skin clinic belongs to dr. Olivia Ong, dipl. AAAM, an aesthetician and Anti-Aging Specialist. 

Here are the steps of the treatment:

1. Cleansing to remove makeup, dirt and oil with cleansing milk and facial foam.

2. Peeling will be applied on clean skin. It’s a very straight forward procedure, using a clear peeling gel (which is exclusively available in this clinic). This peeling gel will absorb into the skin to soften any clogged pores in about 3 minutes with hot steam on, therefore it’ll be easier for the beautician to extract the comedones later.

3. Extraction process is less painful than the other facials I’ve tried elsewhere. That’s because of the peeling which already soften the comedones and during the extraction, hot steam will always on. 

Warning: explicit image of my comedones. LOL. 

4. Mask time. Using a clear gel mask with a cold steam. Don’t worry, it’s not as cold as you imagine..just like a cool breeze which I believe will tone down the redness after extraction process. Mask will not be hardened after 10 minutes recommended time with cold steam always on. 

The whole process only took about 30 minutes. Very simple yet effective facial. 

Here’s the complete address and phone number to call for further information about JAKARTA AESTHETIC CLINIC.

JAKARTA AESTHETIC CLINIC
Jl. Gunawarman No 11
Kebayoran Baru
Jakarta Selatan
021-72793150

PHOTOS: SHINTA ROSVITA (yes, I did a selfie during this peeling facial LOL).

ACE YOUR BASE

image

I’m a new comer in this liquid foundation saga, actually. I used to wear compact foundation in powder texture because I believe it will help me look matte all day long. Well….I was kinda wrong. Though it did look matte when applied, compact foundation have its’ cons. In some dry areas, compact foundation can look unnatural (like people can tell if you’re wearing foundation), and for dry skin it might result in cracks along side of nose, under the eyes and smile lines. Not good.

That’s why these days I believe in the power of liquid foundation. As I age and so does my skin, liquid foundation really does help in terms of even out my skin tone and if I chose the right one (shades and textures wise), it can do even more, like conceal imperfections and create those clean & flawless look.

And this foundation was sent to me by Shiseido. At the box it stated: “An intelligent, long-lasting foundation that beautifully enhances your complexion with vibrance. Flawlessly undetectable. Like it belongs to your skin”. WOW! It had me at everything they stated already. So, here goes my review.

//platform.instagram.com/en_US/embeds.js

Packaging: comes in 30ml frosted glass bottle with pump. One pump is definitely enough for the whole face and neck lines.

Shade: mine is Rose 3, because I have pink undertone. But they have neutral shades for more neutral undertones and golden shades for yellow undertones.

Texture: light but not watery. Very pigmented yet super easy to blend with sponge. And the fact that they come with SPF20, scored!

image

Voila! That’s me after using the foundation.

I like the fact that it did settle very well on my combination skin, I’m really oily on T-Zone and dry on the rest. I only use under eye concealer on the pic above, so this foundation really gives that good coverage without feeling heavy. And it lasts throughout the day without getting cracky. Of course, I applied moisturiser beforehand and set with setting powder for more matte look. But I believe with this foundation, you can skip powder for that natural look. Give it a try and you won’t believe how comfortable this foundation sits on your skin.

MUST HAVE FOR A PERFECT DOUBLE CLEANSE

Well, it did what they stated on the product. SHISEIDO PERFECT CLEANSING OIL.

For me, double cleanse is a must. No matter how late I went home or how tired and stressful I am, I wouldn’t sleep with my makeup on. And since I wear makeup everyday, my skin deserves to ‘breathe’ perfectly at night.

I have to admit, it was quite a struggle finding the right first cleanser to remove makeup and dirt. I started using cleansing milk as teenager, because it was the only makeup remover available on the market at that time. Imagine how many cotton pads had been wasted by me. LOL.

By time, there are cleansing water and cleansing oil. As an avid user of waterproof and long lasting makeup, I’ve tried some of both. I have to admit, cleansing water is good for oily skin, but for powerful waterproof makeup, it just didn’t cleanse well. As for oil, some that I’ve tried previously, are either to sticky for my oily skin, some stung my eyes, and blurred my vision. Not good.

Until I found Shiseido Perfect Cleansing Oil.

image

With key ingredients such as mineral oil, glycerin & grapeseed oil and minimal floral scent, this cleansing oil is my current favorite for my double cleanse routine. I believe oil remove makeup and dirt better than cleansing water, because as you might already know…some makeup do contain oil. So yeah, oil meets oil!

How to apply? They recommend three pumps on the instruction leaflet, but two pumps are enough for me. Pour onto palm then rub directly on face. After a few rubs, add a bit water, rub more until it emulsified. Then rinse with more water.

The texture is clear like water and more liquidy than other cleansing oils that I’ve tried, making this cleansing oil the most lightweight. At my video above, I applied matte liquid lipstick and waterproof eyeliner pencil which I found were the most tough ones to remove. But look at how quickly they were gone with just a finger rub. It must be the Shiseido original Gentle Quick Removing Technology which claimed to rapidly reach deep down into the pores to thoroughly remove dirt & makeup.

The after feeling: very clean, yet no oil residue on hands and face. It won’t make the skin looks matte, however it’ll leave that sort of dewy effect but not shiny. Skin feels soft and plump, not dry. And yes, you can use this for daily use.